

From the desk of Stu Harman, our support and coaching expert. In this article Stu explains how to use the presentation duplicate function to expedite creation of new presentations, the export function to save presentations you've created and the import functions to copy presentations you've created to any BiteFX software as well as facilitate presentation sharing with other BiteFX members.
A very important and powerful feature of BiteFX is the ability to create your own presentations by combining animations and/or pictures to produce a more organized and streamlined BiteFX consultation process. The advantage of using a presentation you create for a consultations is that it enables you to predetermine the content of the presentation, and seamlessly transition from one animation or picture in your presentation to the next using the Next animation / picture button. With presentations, you don’t have to open the Animation or Picture panel to individually select the next item to present to the patient. This saves time and enhances the consultation process greatly.
Here's what I'll cover in this topic (with links if you want to go directly to that section):
Contents
- Overview
- Presentation Controls Description
- Duplicating a Presentation
- Exporting a Presentation
- Importing Presentations
Overview
Hopefully, you are keeping your BiteFX software updated routinely to take advantage of new animations, pictures and features that are added from time to time. Here's what the presentation functions allow you to do:
- Use a presentation created for one patient to quickly modify it for another.
- Create presentation building blocks dealing with different concepts and create more comprehensive presentations for your patients by combining or modifying the building blocks
- Save presentations so they can be appended to any BiteFX software
- Share your presentations with other BiteFX members - useful if you are teaching or mentoring other dentists and want to share with them how you explain occlusion to your patients
- Create an auto-play presentation you can play in your waiting area
Presentation Controls Description
The presentation controls are on the bar above the presentation name:
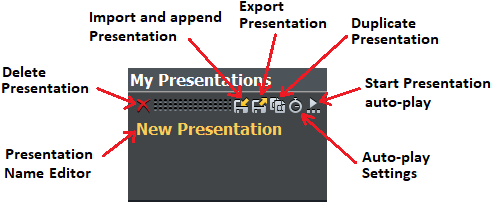
Duplicating a Presentation
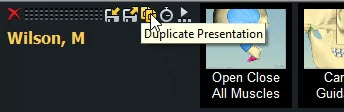
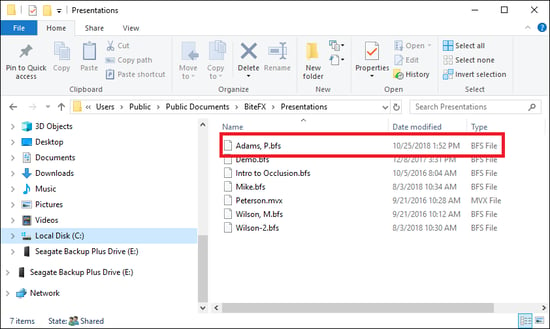
Once a presentation has been created, you can create copies of that presentation and modify them to quickly produce new presentations for other patients with similar occlusal issues. The following image is of a presentation named “Wilson, M” that I will use to demonstrate the duplication process.

- To create a copy of that presentation , click on the Duplicate Presentation button.
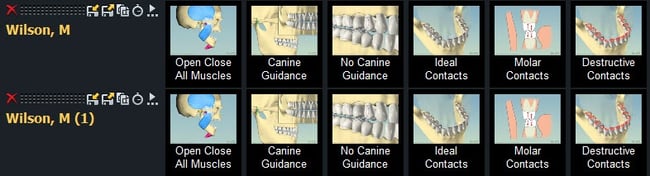
- The duplicated presentation appears immediately below the presentation from which I created it, and includes the same name with brackets surrounding a number indicating which copy it represents (you can create multiple copies of the same presentation). Here you can see the original presentation, “Wilson, M” and the new duplicate presentation that has been created from it, “Wilson, M (1)”
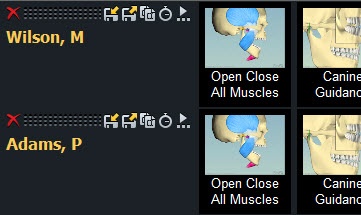
- To rename it, double-click on the text “Wilson, M (1)” and type in the new name. In the example below, the name has been changed to “Adams, P”.
- The newly created presentation can now be modified as needed by dragging animations and images into and out of the presentation row to create your new presentation.
Exporting a Presentation
Presentations can be exported (i.e. saved) to the computer’s hard drive [e.g. Local Disk (C:)], your server, or any other data storage media (e.g. USB flash drive, CD-ROM, etc.) so it can be imported into another BiteFX computer in your office, or shared with other BiteFX members.
For example, if you belong to a study club or teach other dentists, you can share how you communicate a particular treatment plan to your patients and provide your presentation to them so they can review what you showed them. To do this, you simply attach your presentation file to an email to your colleague.
You can export all of your presentations as a single file using the Export Presentations command in the Menu drop-down list so all of the presentations in that file can be imported into another computer at one time, or export individual presentations using the Export Presentation control in the presentation row.
If you plan on copying presentations to BiteFX software throughout your office, we recommend you save your presentations in a folder located on your server so that all BiteFX computers can access the saved presentation files.
Exporting All Presentations At the Same Time
The Export Presentations command using the Menu function must be used if you want to export all of your presentations at the same time as a single file (Note: the Menu export function cannot be used to export individual sequences). The default file name is All Presentations, but the name can be changed if you wish.
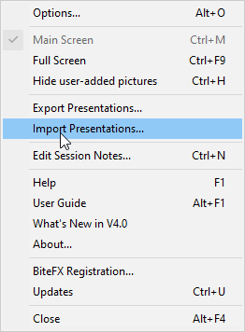
- Click on the Menu button, and then select Export Presentations.
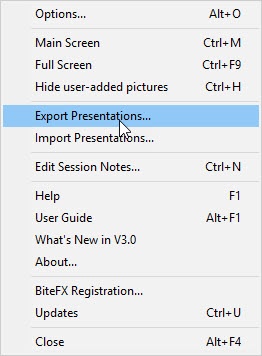
- A Save Presentation dialog appears to allow you to save the file to the destination folder of your choice. In the example below, the file, All Presentations will be saved to the default folder (shown below) on the local hard drive when you click on Save:

Default Presentation file Destination Folder
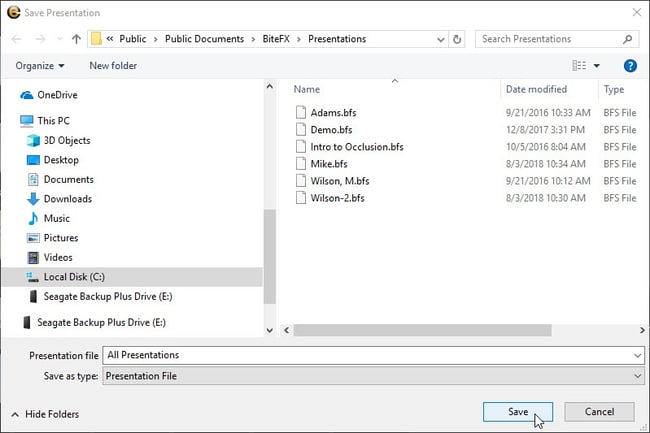
As mentioned previously, if you plan to import saved presentations to other BiteFX software, it's best that you change the destination folder to one located on your server.
Exporting Presentations Individually
Exporting individual presentations can only be done using the presentation row Export Presentation button (with the Animation panel, Picture Panel, or Presentation Template panel open). You cannot export all of the presentations as one file as is possible with the Menu > Export Presentations command previously described.
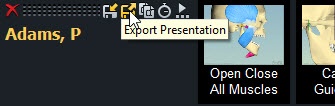
- Click on the Export Presentation button in the presentation row you wish to export. In the example below, the presentation “Adams, P” will be exported.
- The Save Presentation dialog opens so you can select the destination folder. Click on Save to export the presentation file.
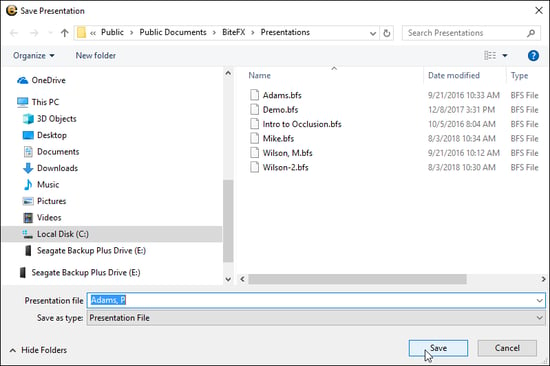
- As you can see in the following image, the presentation file “Adams, P” has been saved to the BiteFX > Presentations folder
Importing Presentations
Once a presentation has been created and exported or is otherwise available as a saved .bfs file (.bfs is the type, or extension of the file), that presentation can be imported and appended into the My Presentations area of any BiteFX software.. This avoids the need to recreate your favorite presentations manually on each BiteFX computer. Another useful application is to create a series of "mini-presentations" that focus on particular occlusal concepts (e.g., Opening & Closing of Jaw, Guidance, Destructive Wear, Splint Therapy) that can then be imported into the same presentation row cumulatively to create a full presentation quickly.
Presentations can be imported from the Menu, or from a presentation row (with the Animation panel, Picture panel, or Presentation Template panel open).
Importing an "All Presentations" File
Importing an All Presentations file can only be done using the Menu > Import Presentations command.
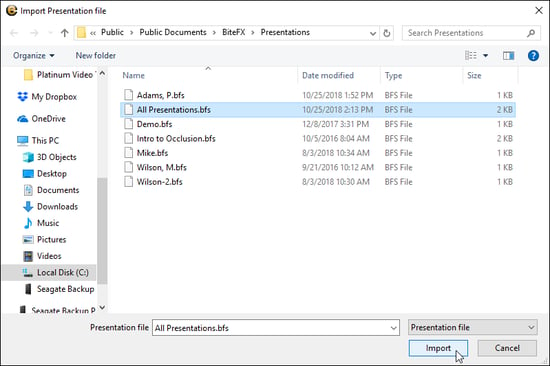
- Click on Menu, and then select Import Presentations.

- Click once on All Presentations.bfs and then click on Import.
- All of the individual presentations that were exported as an All Presentations file are added to the BiteFX software as individual presentations.
Importing Presentations Individually Using the Menu
- Click on Menu, and then select Import Presentations.
- Select the .bfs presentation file you want to import, and then click on Open. Here I've selected the presentation "Canine Guidance".

- The Canine Guidance presentation has been added to the next available My Presentations row as a new individual presentation.

Importing Presentations Individually From a Presentation Row
Although the Menu > Import Presentations command allows you to import both All Sequences files and individual presentation files, when you use the Import and append Presentation button in a presentation row for importing, you can only import individual presentations.
Note: If you try to import an All Presentations file, when you select that file and click on Import, nothing will happen.
Importing an Individual Presentation into a New Presentation Row
- With the Animation, Picture or Presentation Template panel open, click on the Import and append Presentation button the blank presentation row.
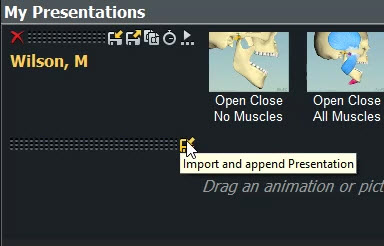
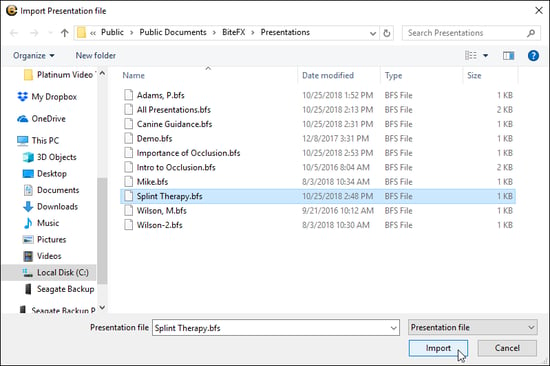
- Select the presentation file you would like imported into that row, and then click on Import. Here, I selected "Splint Therapy".
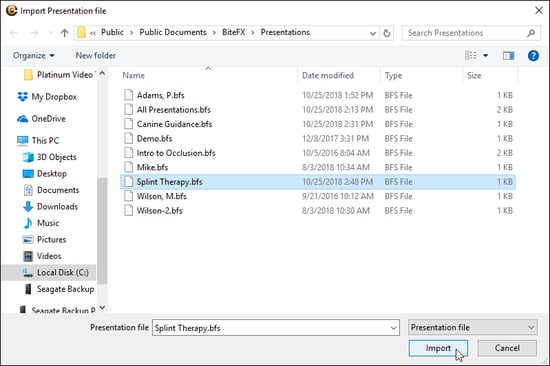
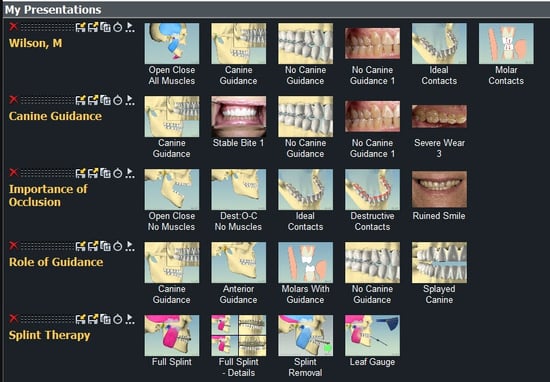
- As you can see from the image below, the selected presentation, "Splint Therapy" has been added to the blank presentation row that was just below the presentation, Wilson, M.

Importing Multiple Presentations into the Same Presentation Row
As described previously, BiteFX allows you to combine presentations together in the same row to create a fuller presentation. Here’s how you do it.
- In the row that you wish to begin combining presentations (can be on an existing presentation row or on a blank row), click on the Import and append Presentation button.
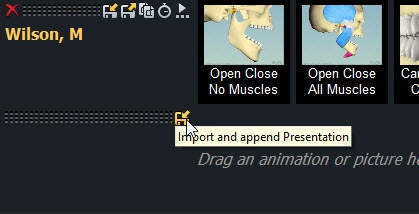
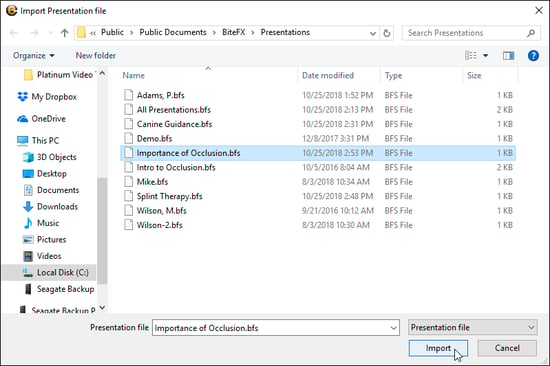
- Select the first presentation component you wish to append; here I've selected Importance of Occlusion, and then click on OK.
- If you have added the presentation to an existing presentation row, the previous name of the presentation will remain unchanged. If you are creating a new presentation, the name of the first presentation file you import will appear. In the example below, I'm renaming the presentation from Importance of Occlusion to Thompson.
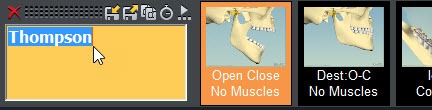
- To add another presentation to the same row, click on the Import and append Presentation button again in that same row and select the next presentation file you would like to add to it. In this example I'm going to add Splint Therapy to end of my Thompson presentation.

- As you can see from the image below, the animations and pictures in the presentation I selected to import, "Splint Therapy" have been added cumulatively to the Thompson presentation row.

- Continue adding presentations to create your full presentation. As with any presentation in the My Presentations rows, the animations and pictures can be reorganized or removed from the presentation, and additional animations and pictures added as needed.
If you need further assistance learning how to use the Presentation duplicate, export and import features, please contact us by email at your convenience, or by telephone Mon-Fri 8am–5pm Pacific Time:
1-877-2BiteFX (1-877-224-8339)
International (+1) 530-582-1189