

From the desk of Stu Harman, our support and coaching expert. In this article Stu provides a comprehensive guide for the BiteFX for iPad app.
This BiteFX iPad guide explains important features and how to use them with the latest version of BiteFX for iPad.
In This Guide:
- Installing the Free BiteFX App
- Logging In to Download the Full BiteFX App
- Updating BiteFX
- Opening the Animation, Picture and Presentation Template Panels
- Selecting and Playing Animations
- Opening the Information Pane
- Selecting Pictures
- Importing Pictures
- Hiding /Unhiding Imported Pictures
- Selecting and Playing Presentation Templates
- Duplicating and Modifying Presentation Templates
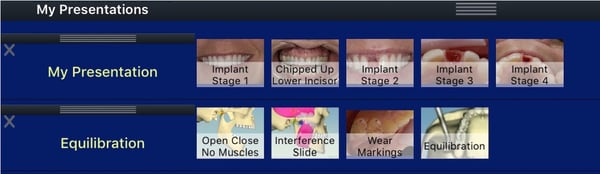
- Creating, Naming, Playing, and Deleting Presentations
- BiteFX Support
For the first three topics in this blog, you can also read our more detailed blog article, Downloading and Updating BiteFX for iPad.
Installing the Free BiteFX App
This first step installs the BiteFX app with a limited number of animations only.
- Open the App Store.
- Search for bitefx.
- Tap on the iCloud icon to download the app.
- Start the BiteFX app by tapping on "Open".
Logging In to Download the Full BiteFX App
Note: If you purchased the BiteFX 6-month subscription directly from Apple, the full version will begin downloading without the need to log in as described in this section.
- With the BiteFX app started, tap on the Menu tab.
- Tap on Login.
- Enter the email address you used when ordering your BiteFX Membership.
- Enter the 16-digit password (omit the hyphens) provided in the BiteFX Order Receipt email you were sent after accepting the terms of the software license agreement.
- Tap on Login.
- A "Subscription Verified" message will appear after a brief pause, and the full version will begin downloading.
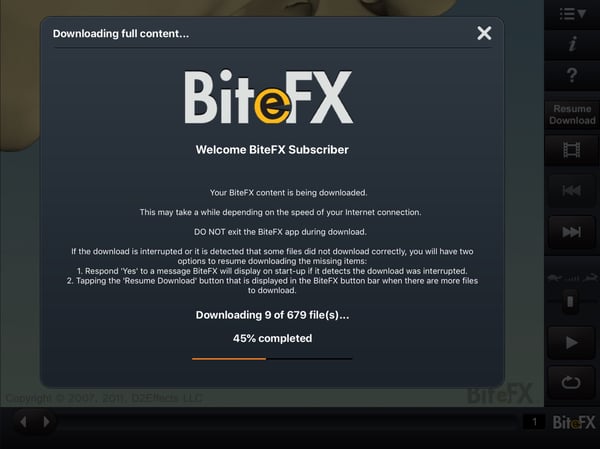
- If all files of the do not download successfully on the first attempt, tap on "Yes" when prompted to continue the downloading process until all files downloaded successfully.
Updating BiteFX
For a more detailed explanation, read our blog article, Adding Animation Updates.
- If an alert symbol appears over the Menu icon, tap on the Menu tab to open the Menu list.
- Tap on "Updates".
- When the BiteFX Update dialog appears, tap on "Download Updates".
- As with the previous section, if all of the update files do not download successfully on the first attempt, tap on "Yes" when prompted to continue the downloading process until all update files downloaded successfully.
Opening the Animation, Picture and Presentation Template Panels
- Tap on the "Display Animation, Picture, and Presentation Template Selection Panel" tab.

- At the top of the displayed panel, note that there are three icons. On the left is the Animation panel icon, the center symbol is the Picture panel icon (orange) and to the right is the Presentation Template panel icon.

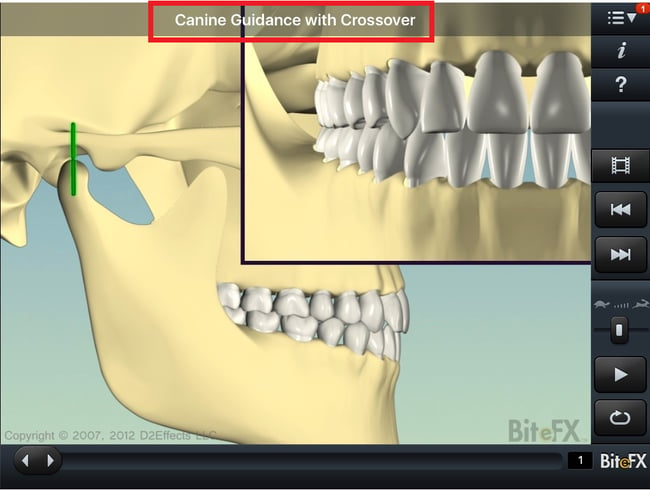
- Simply tap on the appropriate icon to select the panel you wish to open. To select animations and pictures, tap inside the thumbnail. The name of the animation or picture will be briefly displayed at the top of the screen. In the example below, the animation Canine Guidance with Crossover has been selected and the play controls have become active.
Selecting and Playing Animations
- Tap on the Animation panel icon to open the Animation panel.

- Tap inside the thumbnail of the animation you want to play. If the animation won't appear, check to make sure that the Padlock icon appears as a locked padlock; tap on the icon to lock it if necessary and tap on the animation thumbnail again.
- You can choose to have the software play the animation for you or manually play the software using your finger.
- Software Play
- Tap on the "Loop" tab if not already activated (icon is orange when activated).
- Tap on the "Play" tab.
- Adjust the play speed by moving the Play Speed Slider up or down with your finger.
- Manual Play
- Drag the Slider at the bottom of the screen left and right to select a specific frame or move a specific segment of the animation.
- Software Play
Opening the Information Pane
After selecting an animation to play, you can tap on the italic "i" in the menu column to display information about the selected animation. Tap on the "i" again to turn the Information pane off.Selecting Pictures
- Open the Picture panel.
- Tap in the thumbnail of the picture you want to display.
Importing Pictures
You can import an individual picture or group of pictures into a new row, or into an existing imported album you've created.
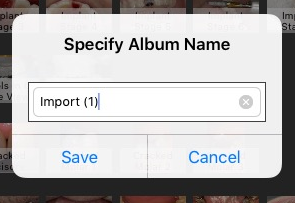
Importing Pictures Into a New Album Row
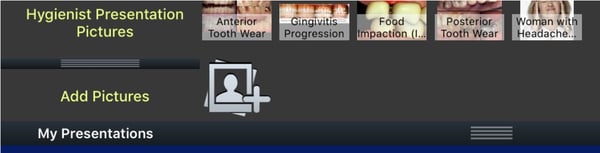
- Open the Picture panel and finger scroll down below the BiteFX-provided albums.
- In the Add Pictures row, tap on the "Add Pictures" icon to the right.
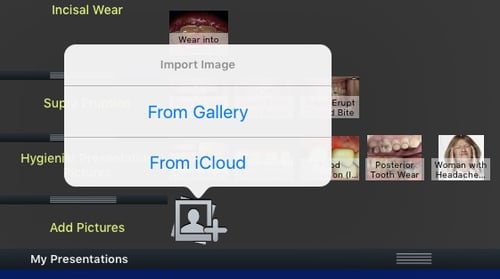
- Select either Gallery or iCloud, depending on the location of the picture file(s) to be imported.
- Select the pictures you want to import and then tap on "Done".
- Re-name the album with your virtual keyboard and tap on "Save" when finished.
Importing Pictures Into an Existing Album
- In any album row you've already created, tap on the Add Pictures icon to the right of the existing pictures.
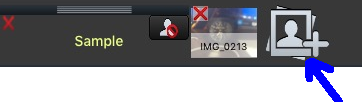
- Tap on Gallery or iCloud and select the new pictures you want to import, then tap on "Done".
Hiding/Unhiding Imported Pictures
To facilitate compliance with applicable health record privacy laws, the BiteFX app allows you to hide pictures of other patients you may have imported from view by the patient you are currently presenting to with BiteFX. You can hide and unhide the pictures that are in individual albums, or hide and unhide all your imported pictures at one time.
Hiding/Unhiding Pictures in an Individual Album
- Open the Picture panel and scroll down to your imported albums.
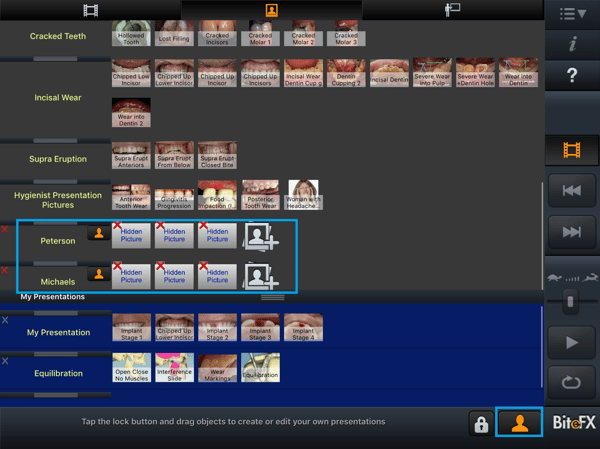
- To hide the pictures in an individual album, tap on the "Hide/Unhide Pictures" tab to the right of the album name. In the example below, all of the pictures in the album "Peterson" will be hidden.
 Imported Albums Before Hiding Pictures in the Peterson Album
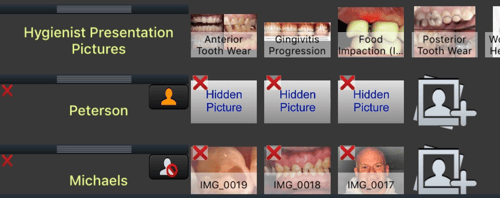 All Pictures in the Peterson Album Hidden
 - To unhide the pictures, just tap on the same icon again.
Hiding Pictures in All Albums At One Time
- Open the Picture panel.
- Tap on the "Hide/Unhide All Pictures" icon at the lower right corner of the main screen.
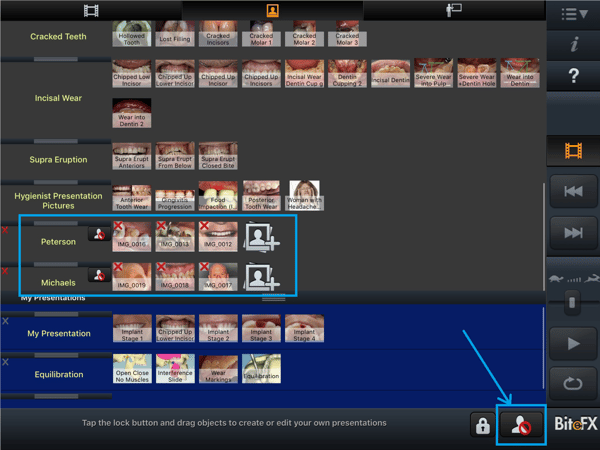
- As you can see in the image below, the imported pictures that are in the two imported albums all display "Hidden Picture" now.
- To unhide all of the imported pictures at one time, just tap on the same icon again.
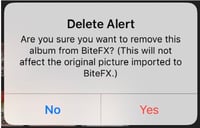
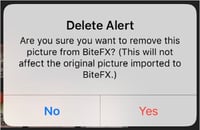
Deleting Albums and Removing Individual Pictures
- Tap on the red "X" in the upper right corner of the album you want to delete, or in the upper left corner of the picture you want to remove.
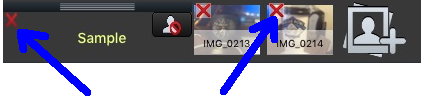 Delete Album Delete Picture
 - Tap on "Yes" when the Delete Alert dialog is displayed to complete the process.
Selecting and Playing Presentation Templates
- Open the Presentation Template panel.
- Tap on the first thumbnail in the template you want to present.
- For continuous looping, tap on the "Loop" tab before starting to play the animation.
- Tap on the "Play" tab and adjust the play speed using the "Play Speed Slider".
- Select the next item in the template by tapping on the "Next item" button in the menu column.
- For a detailed description of the purpose of any presentation template, tap on the italic "i" at the upper left corner of the template name.

Duplicating and Modifying Presentation Templates
- Open the Presentation Template panel.
- Click on "Duplicate Presentation" tab for the presentation template you want to copy.

- An exact copy of the template will be appended to the next empty row in the My Presentations area.
- The copied template can now be modified by dragging unwanted thumbnails out of the presentation, and dragging the animations and pictures you want included into the presentation from the Animation and Picture panels.
Creating, Renaming, Playing, and Deleting Presentations
- Open the Animation panel or Picture panel.
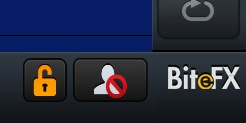
- Tap on the Padlock icon in the lower right corner of the main screen so it appears unlocked as shown below.
- Begin dragging animations and pictures down into the blank "My Presentations" row using your finger.
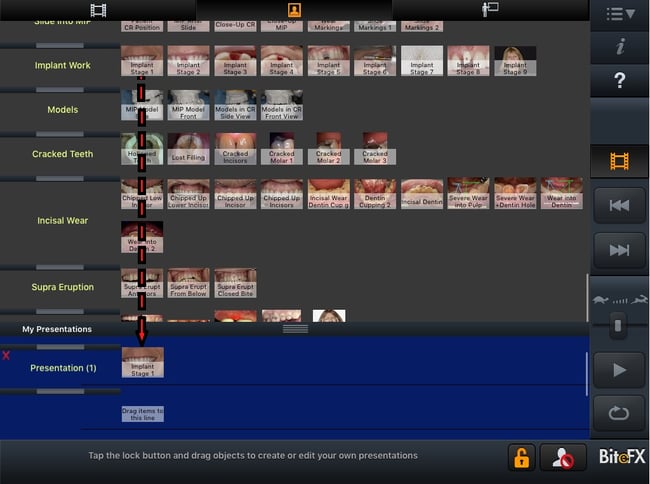
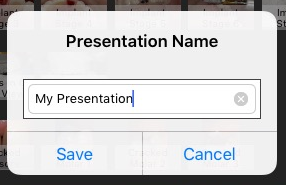
- Once you have started creating a presentation, you can re-name it any time:
- Tap on the default name "Presentation (1)" to display the Presentation Name dialog.
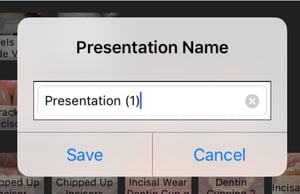
- Tap on the "X" to the right of the name box to erase the default name, type in the new name using your virtual keyboard, and then tap on "Save".
- Tap on the default name "Presentation (1)" to display the Presentation Name dialog.
- To begin using your presentation, be sure to re-lock the Padlock first by tapping on the Padlock icon. Now you can tap on the first item in your presentation to select it.
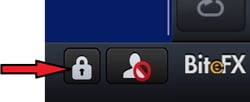
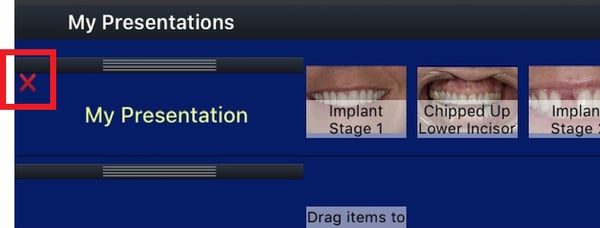
- To delete a presentation you no longer need, unlock the Padlock, then tap on the red "X" to the upper left of the presentation name.
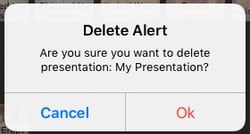
- A Delete Alert dialog will appear. Tap on "Ok" to complete the delete process.
BiteFX Support
If you would like our assistance learning how to use your BiteFX for iPad software, please contact us by email at your convenience, or by telephone Mon-Fri 8am–5pm Pacific Time:
1-877-2BiteFX (1-877-224-8339)
International (+1) 530-582-1189