

- Create a Folder
- Import
- Add Notes to Your Pictures Using Menu > Edit Session Notes
- Add Notes to Your Pictures After Recording as BiteFX Session
- Modify Picture Notes
- Share
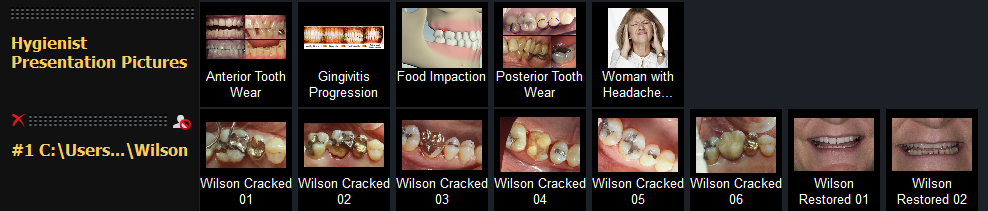
- Open the Picture panel and scroll down to your imported pictures (imported pictures are always placed below the embedded albums provided by the BiteFX software).
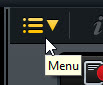
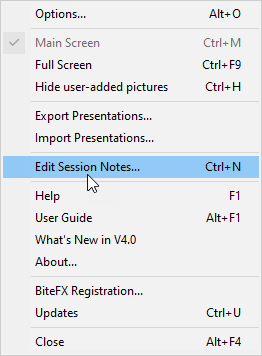
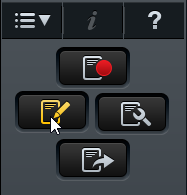
- Select the first picture in the imported row so it appears in the main screen.Click on the BiteFX Menu button to display the drop down list. Select "Edit Session Notes" from the menu list (or hit Ctrl+N on your keyboard).
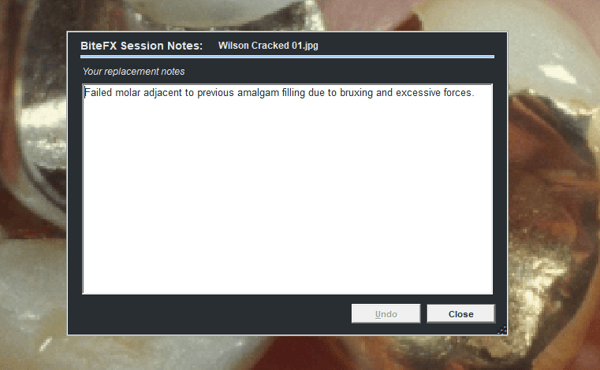
- A "BiteFX Session Notes" dialog will appear. Type in the notes you wish to associate with that image, then click on "Close".
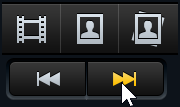
- If there is more than one picture in the imported album, click on the "Next animation/picture" button to progress to the next picture in the row:
- A new blank "BiteFX Session Notes" dialog will appear for you to enter the new text.
- Follow steps 3 & 4 until you have added notes for all of the pictures in your imported folder.
- When finished, click on "Close" at the bottom right corner of the editing window to close it.
Add Notes to Your Pictures After Recording a BiteFX Session
- After recording your consultation session with BiteFX, click on the Edit session recording button to open the recording notes editing window.
- Scroll to the first imported picture in the recording.
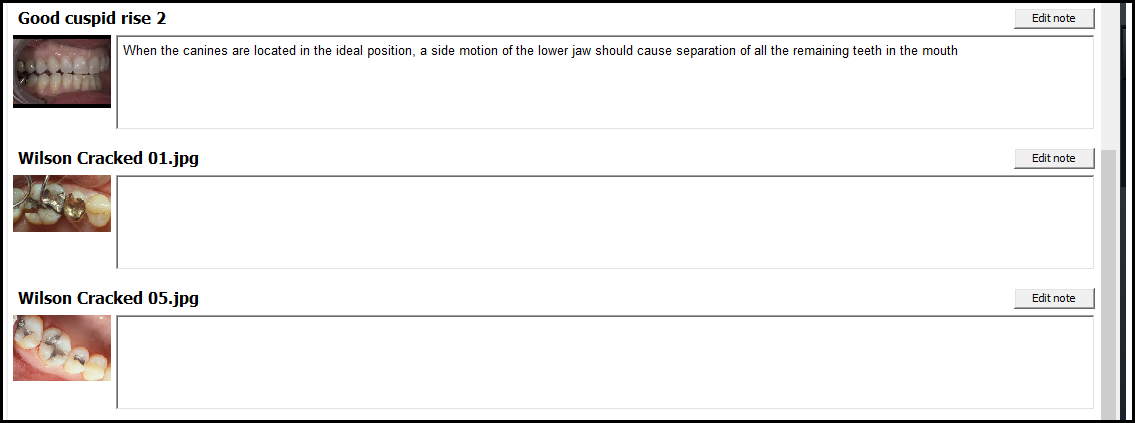
- Open the note editing window by either clicking on "Edit note" at the far right side of the picture's name, or just click inside the box; either method opens the window.

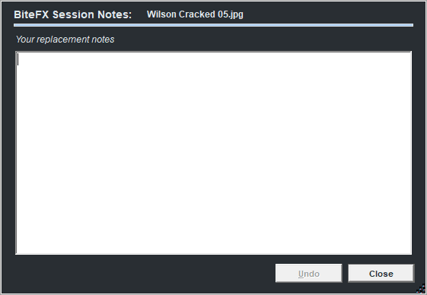
- Type in your notes and when finished, click on "Close".

- Scroll to the next imported picture as needed and repeat steps 3 & 4 above until notes have been added to all the imported pictures in the recording.
Modify Picture Notes
- Once notes have been created for a picture, whenever that picture is used in a BiteFX session recording, those notes will be displayed in the BiteFX Session Report when it is published.
- Picture notes can be modified anytime as follows:
- Open the Picture panel.
- Select the picture.
- Select "Edit session notes" from the Menu drop-down list.
- Delete the existing notes and replacing them using Menu > Edit Session Notes method described previously.
Share Picture Notes Between BiteFX Computers
If you have activated Use Information Sharing from the Options > Information Sharing sub-menu, when you add or modify notes for an imported picture on one computer, those notes will automatically be appended to that same picture on every other BiteFX computer where that picture has been imported as well.
If you need further assistance learning how add notes to your imported pictures in BiteFX for Windows, please contact us by email at your convenience, or by telephone Mon-Fri 8am–5pm Pacific Time:
1-877-2BiteFX (1-877-224-8339)
International (+1) 530-582-1189