

From the desk of Stu Harman, our support and coaching expert. In this article Stu explains how to import your own clinical images into your BiteFX for Windows software.
BiteFX animations provide a powerful tool to help patients understand the nature of their occlusal disease. Combining BiteFX animations with clinical photographs of the patient’s teeth is a great way to help your patients understand, accept their condition, and be more open-minded towards accepting your treatment recommendations. When you see your patient's eyes light up with understanding, using imported pictures is sure to be a favorite way to present a BiteFX consultation.
First of all, let's be clear what we mean by the term "import". What we are actually describing is the process of creating thumbnail images and shortcuts in BiteFX that point to picture files in an existing folder you've chosen to import. When completed, you're now able to select and display those pictures without having to exit the BiteFX application. So, when a folder is "imported" into BiteFX, the actual folder with its contents remains where it was last located, and when you remove a folder (also referred to as an "album") from BiteFX, the actual folder of pictures is not deleted, only the shortcuts and thumbnail images that were created for that folder.
Let's start off with a few important facts you need to know:
- Images that can be imported and selected for view within BiteFX must be JPG, BMP, or PNG file formats. Although it is permissible to have other types of files contained within the same folder (e.g. MS Excel or MS Word documents), those files will not be visible and cannot be selected within BiteFX.
- Even if you only want to import a single image, that image file must be contained in a folder.
- We strongly recommend you create and maintain photos to be used in BiteFX on a shared network server so that all of your workstations with BiteFX installed can navigate to those folders. Note: If you wish to use the Information Sharing feature, the imported images must be saved to a Network shared drive.
- To avoid importing a large number of photographs into BiteFX, many of which you may not need for the patient's consultation, you may want to copy the images you will actually use into a separate folder (e.g., create a folder named "BiteFX" on a shared network drive, within that folder create a sub-folder named "BiteFX Photos", and then create individual patient and case picture folders inside that sub-folder).
Browse for the Folder
- Make sure the images you want to import are JPG, BMP or PNG files and are saved in a folder.
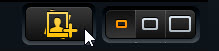
- With either the Animation, Picture or Presentation Template panel open, click on the "Add picture album" located at the lower right corner of the BiteFX main screen.
- When the Choose Picture Folder browser opens, navigate to the folder you want to import.
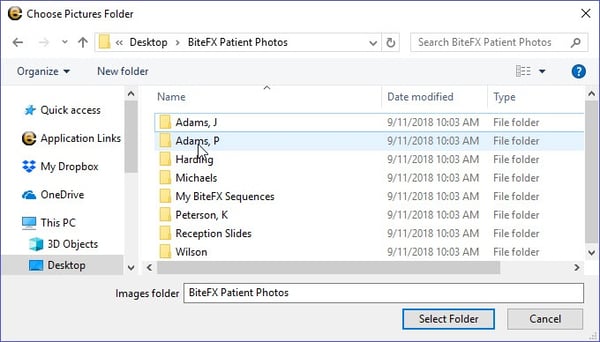
- Click once on the folder name to highlight it, and then click on "Select Folder".
- Your imported album will be located in the Picture panel, below all the BiteFX albums contained in the software so you will likely need to scroll down to view the imported album.
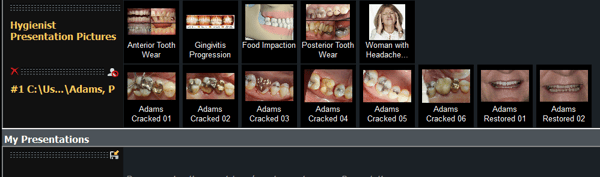
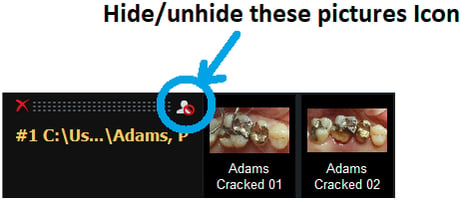
- Note that there are two unique icons in the upper left and right corners of the imported album.
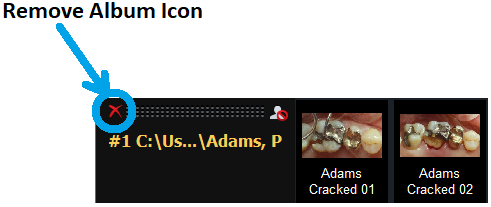
- In the upper left corner, a "Remove album" icon appears as a red "X" to allow you to remove the album (i.e. thumbnail images and shortcuts) from BiteFX when it is no longer needed.
- In the upper right corner, a "Hide/unhide these pictures" button, represented by the silhouette of a person with the international "NO" symbol, appears that allows you to comply with applicable regulations that prohibit the sharing of ID or medical records (e.g. HIPAA or equivalent regulations) by hiding the images in that folder from view by other patients.
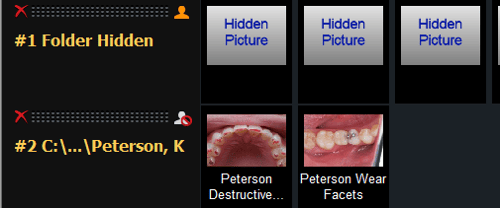
You can hide and unhide all your imported pictures at the same time using the "Hide/unhide pictures" button located at the lower right corner of the BiteFX main screen.
For step-by-step instructions how to hide and unhide imported images, read the blog "How to Use the Hide/Unhide Images Controls in BiteFX for Windows".
Don't Move or Delete the Folder
- If you want to continue viewing imported images in the BiteFX application, and if you save presentations that include imported images for future use, it is imperative that the folder of images not be moved or deleted! Here's why:
- This will cause the BiteFX software to "lose track" of the picture file's location so now the shortcuts that were created for the picture files in the import process will no longer work because they're no longer there.
- If you try to select a picture from an imported album whose source folder has been moved or deleted, even though that album's thumbnail and its individual image thumbnails will still appear in the Picture panel, the displayed screen will be blank:

Adding Notes to Imported Images
Now that you have imported images into BiteFX, you can add your own notes so they will automatically appear in your BiteFX session report when the images are used in a recording. For detailed instructions how to add your notes, read the blog "Treatment Plan: Adding Session Notes to Imported Pictures".
If you need further assistance importing images into BiteFX for Windows, please contact us by email at your convenience, or by telephone Mon-Fri 8am–5pm Pacific Time:
1-877-2BiteFX (1-877-224-8339)
International (+1) 530-582-1189