

Great article last week from Dr. Shannon Johnson writing for the Dawson Academy Blog on how to get started with dental photography.
My business partner, Dr. Don Reid, the dental expert behind the creation of BiteFX, is forever snapping photos of his patients and their teeth and believes strongly that it makes a really big difference to how well they relate to his treatment plans. He adds another dimension to the equation in that he'll often take the photos through a microscope so that he can show his patients full screen views of deteriorating molars so that even I, without my reading glasses on, can see where the problems are! But if you are not already taking photos that may be something you should store away for "stage 2".
If you are not already using photos regularly, then I'd recommend that you read Dr. Johnson's article, follow her advice to start taking photos, and then come back to this blog for tips on integrating photos into your presentations.
If you are already taking photos, then BiteFX V2 makes it a breeze to integrate photos into your presentations. Here's how:
Step 1: Organize your photos into folders.
You'll need to do this for your own sanity and record keeping. I would suggest having separate folders for each patient (so you reduce the risk of accidentally showing one patient the photos of another) and possibly creating a dated folder for each photo session with each patient. Name the dated folders in the form III-YYYY-MM-DD (where III are patient initials, or other brief ID, YYYY is the 4 digit year, MM two digit month, DD two digit date) that way they will naturally fall into date order when you sort the folders by name (just make sure you always use two digits for the months and days: "04" for April, "07" for the seventh otherwise the folder ordering won't work as 2012-12-4 will come before 2012-12-15). So the organization will look something like this:
My Photos
Jennifer Eccles
JE-2012-11-04
JE-2012-12-15
Lilly Pink
LP-2012-11-11
LP-2012-12-15
LP-2013-01-04
...
The initials on the sub-folders will help you identify them when you add them to BiteFX.
Step 2: Add the folders you wish to use to your BiteFX Albums
To do this you:
-
Display the albums panel by clicking on the Album panel on/off button:

-
Click on the add new button:

-
Then browse to your folder, select it and click OK.
Your photos will now be available in the BiteFX picture panel.
Step 3: Insert the photos in your presentation
This is probably one of the enhancements in BiteFX V2 that generates the most excitement with people seeing the new V2 upgrade for the first time.
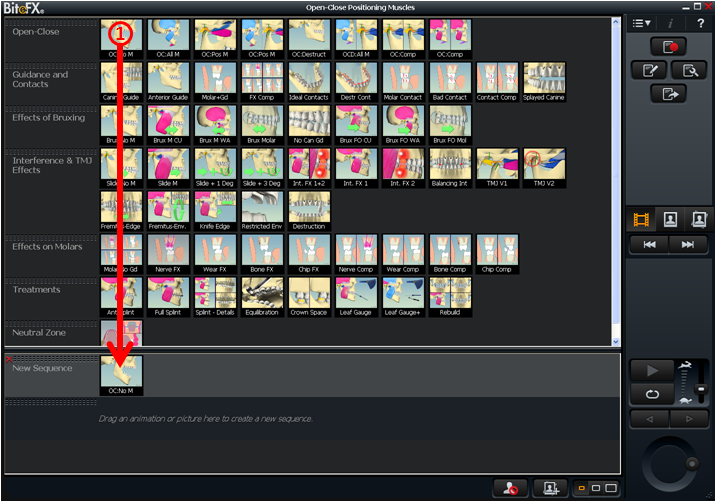
You create your own presentation ("sequence") of animations by just dragging them from the fixed area of the animation panel to the sequence area. Here's the first:
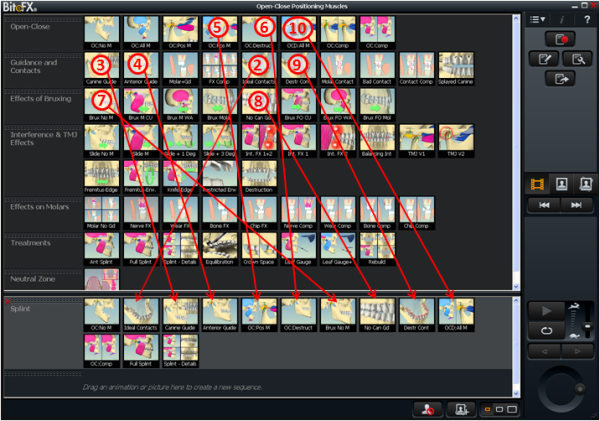
Followed by however many others you wish to add:
Then, to add pictures, you simply switch to the picture panel and drag and drop the photos at just the right spots:
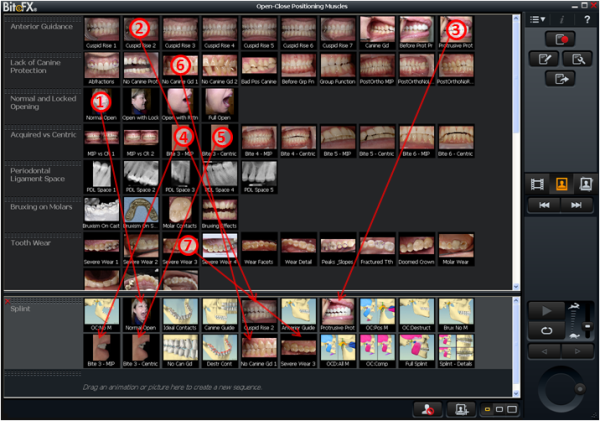
You don't have to use pictures of your patient all the way through as they may not show the precise state you want to illustrate, but a careful selection of just a few of the patient's own pictures can make a huge difference in how well they relate your explanations to their mouths and the treatment they need.
Do you have any tips on the best photos to take or where to introduce patient-specific photos? Add them in comments below!
Want to find out more about BiteFX V2? Check out the BiteFX V2 upgrade page or try it out for yourself.