

| From the desk of Stu Harman, our support and coaching expert. In this article Stu explains how to integrate your own clinical photos with your BiteFX presentation on the iPad. | 
|
BiteFX animations provide a powerful tool to help patients understand the nature of their occlusal disease. Combining BiteFX animations with clinical photographs of the patient’s teeth is a great way to help your patients understand, accept their condition, and be more open-minded towards accepting your treatment recommendations.
Unlike the Windows version of BiteFX, the iPad version does not include a picture panel or the ability to import photo albums. However, clinical photographs can still be integrated with your BiteFX consultation quite easily. Here's how:
Synching Photos to the iPad using iTunes
- If not already done, create a folder on your computer and add the pictures you want to put on your iPad to that folder (the default folder iTunes synchs with is My Pictures or Pictures but the folder to synch with the iPad can be changed).
- Connect your iPad to your computer.
- If iTunes does not open automatically, open the iTunes application.
- You should see your iPad device in the Side Bar (if the Side Bar is not visible, select View, then Show Side Bar).
If the device name doesn’t appear, disconnect the cable from the iPad, and then re-connect it.
- Click on your device name (for example mine says "Stu's iPad") so the iPad information page appears in the main screen
- Select Photos from the task bar at the top.

- Check the “Synch Photos from” box.

- The default folder for syncing photos is My Pictures or Pictures on a Windows-based PC and Pictures on a Mac. You can change this by clicking on the drop down menu. Click the up-down arrow to the right of the "Sync Photos from" target and browse to your folder.
- Once your main folder has been chosen, you can sync all folders under that main folder or select specific photos. To add multiple albums, create individual folders within the main folder (for example, create separate folders for each patient, for different case examples, various treatment examples, etc.)
- Click on Sync at the bottom right corner of the iTunes screen to add the folder to your iPad. This will be saved as an album or multiple albums in your iPad Photos app.
- Note that when synching photos in iTunes, the current album will be entirely replaced. To retain previously synched photos, alway use the same folder to save existing and new photos to be added to the iPad Photo app.
Fast Switching Between the BiteFX and Photo Apps
-
- Make sure that Multitasking Gestures are switched on:
- Open your iPad Settings app
- Select General and find the Multitasking Gestures item.
- Check that Multitasking Gestures feature is set to “On”
- Read the text below Multitasking Gestures so you know what the gestures are and what they do.
- Open the Album app so you can see the photographs you’ve imported to your iPad that you wish to use during the consultation.
- Tap the iPad Home key once (or use the multi-fingered pinch that you have just learned)
- Tap the BiteFX icon to open the app and select the first animation you wish to show at this time.
- To switch to your photo album, swipe four fingers across the iPad screen.
You may have to experiment with which direction to swipe your fingers until you are comfortable switching back and forth between the BiteFX app and the Photo app.
- After the consultation, if you wish to remove the imported album from your iPad, follow these steps:
- Reconnect your iPad to the computer, and make sure iTunes is open.
- On the iTunes Side Bar, click on your device name to open the iPad information page.
- Select the Photos page.
- Browse to the folder you used originally to create the album on your iPad.
- Click on the check mark to the left of "Sync Photos from".
A dialog box will appear with the option to either Remove Photos or Keep Photos.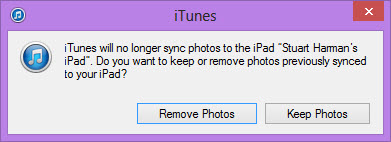
- Click on Remove Photos.
- In the lower right corner of the iPad, click on the Apply button. Your iPad will begin syncing with iTunes and the album will be removed from your iPad.

- Reconnect your iPad to the computer, and make sure iTunes is open.
For more comprehensive information on how to manage photographs on your iPad, consult your iPad User Guide.