

How to Create Your Own Presentation
From the desk of Stu Harman, our support and coaching expert. In this article Stu explains how to create your own presentations using animations and images to produce personalized consultation presentations or templates.
BiteFX provides 13 animation groups in the Animation panel that are named according to occlusal topics; they are Open-Close, Guidance and Contacts, Effects of Bruxing, Interference and TMJ Effects, Effects on Molars, Effects on Molars with 3D Insets, Diagnostics, Treatments, Neutral Zone, Sleep Apnea, Condylar Issues, 3D Views of TMJ, and Muscular Issues. Each of the animation groups include a select number of animations related to that topic, comprising more than 140 animations in total at present. BiteFX also includes over 150 occlusion related clinical photographs and images in the Picture panel that can be used to show actual clinical examples of malocclusion and treatments.
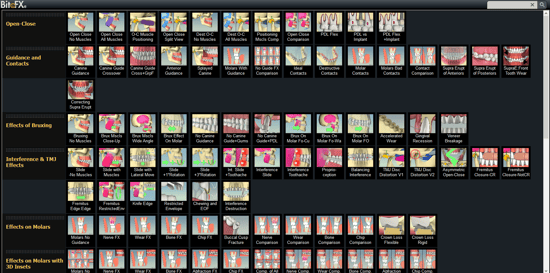
Figure 1. Animation Panel
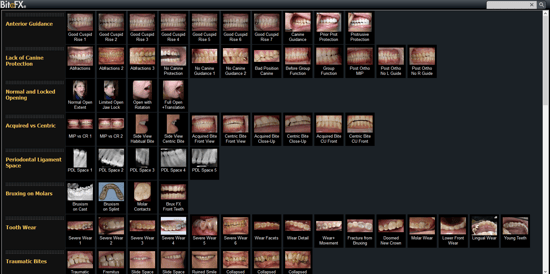
Figure 2. Picture Panel
The BiteFX control interface makes it easy to open the Animation or Picture panel to select the animation or image you want to show. However, even with experienced users, the simple act of opening a menu, selecting the item you wish to show and then playing or displaying the item may appear a bit tedious to your patient or audience.
In addition, there may be presentations you make that you want to repeat again and again, such as when presenting generic occlusal concepts, for example “Importance of Occlusion”, or perhaps “TMJ Disorders” and so on. If you’re like me, I don’t want to manually select the same animations and images over and over if I can help it.
BiteFX gives you the ability to create a virtually limitless number of your own presentations using a simple drag and drop process, and combine animations and pictures in that same presentation. The result is a more linear and organized looking presentation (like a slide show), and can save you time when creating similar presentations in the future since you can use short topic-specific presentations as “building blocks” for new presentations by adding and removing animations and pictures as needed.
Here is how I create a presentation - I’m going to build my presentation for my hypothetical patient, Mary Wilson.
- Using a commonly used paradigm, the presentation will consist of a combination of animations and pictures to move Mary forward in her understanding of her occlusal disease by explaining normal occlusion, a brief review of her occlusal issues, treatment options and the consequences of delayed or ignored treatment.
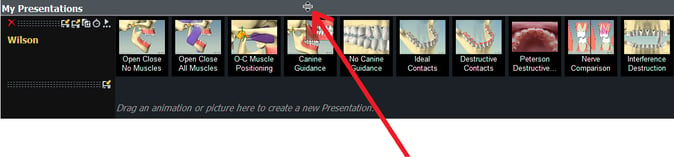
- Regardless of which menu panel you have open, there is a section beneath the main menu screen labeled My Presentations and in a blank row beneath that, the text “Drag an animation or picture here to create a new Presentation.” This is where we construct our presentations.
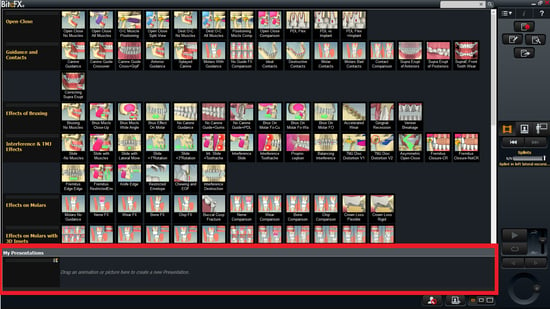
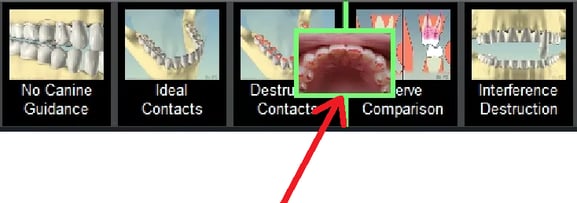
Figure 3. Image of Animation Panel with Presentation Row Highlighted

Figure 4. Close-up of My Presentations Area and Blank Presentation Row
- A nice, efficient way to build your presentation is to start by opening your Animation panel and add the animations you want first, and then open the Picture panel and drop in the images where you want them within the new presentation.
- A common method is for BiteFX dentists to begin by providing an overview of the healthy masticatory system and how it works, so the first animation I will add is Open-Close No Muscles. I simply select the thumbnail and, while holding down the mouse button, I drag the thumbnail down to the new presentation row and release the mouse button.

- As soon as I add the first item, three things happen:
- The default presentation name, “New Presentation” appears,
- A red “X” appears above and to the left of that name, and
- A new blank presentation row appears beneath the newly created presentation.
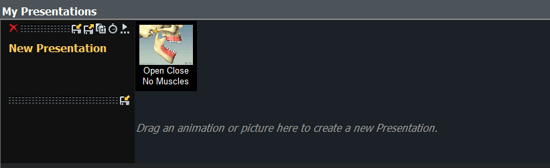
- To rename the presentation, double-click on the name "New Presentation" and then type in the new name. For this demonstration, I’ve typed in the name of my hypothetical patient, “Wilson” and then hit "Enter" on my keyboard.


- I continue building my presentation with additional animations to show malocclusion, treatments and implications of ignored treatment.

- After adding all of the animations I want, I open the Picture panel to add some images. Combining animations and images is a powerful synergistic tool to help your patients understand their issues. As I drag an image into my presentation row, a vertical green line appears to show where that thumbnail will be placed when you release the mouse button. If I need to re-order any of the thumbnails after adding them to the presentation, I simply slide that thumbnail left or right until the green line is where I want to re-position that thumbnail.

- You may want to consider adding pictures of the patient’s teeth, pictures of previous cases you’ve delivered to demonstrate treatment phases and to instill confidence with your dental artistry and skill, and perhaps some additional pictures to show what the consequences of non-treatment may be.
- As described earlier, whenever a new presentation is created, BiteFX automatically adds a new blank row below that presentation. When creating a presentation that contain a large number of items, some of the rows may be obscured, depending on how your BiteFX window is formatted. There are two ways to change the view of the rows beneath My Presentation:
- Use the Scroll Bar to the right of the My Presentation rows to scroll up and down until you can see the row you want:

- Move the margin line using your mouse to increase the viewing area. When the mouse cursor is moved onto the margin line separating the Animation or Picture panel window and the My Presentations area, the cursor becomes a horizontal adjust pointer. While holding down the left mouse button, slide the margin line up to increase or down to decrease the viewing area of the My Presentation rows.
- Once my presentation is finished and I'm ready to present it, I just click on the first thumbnail to select it. Because the first item in my Wilson presentation is Open-Close No Muscles, that animation will be displayed in the main screen, and ready to play.

Figure 5. Open-Close: No Muscles Selected From the "Wilson" Presentation
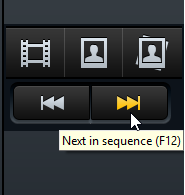
- After reviewing the concept with the patient, rather than opening the Animation or Picture panel to select my next item, all I have to do is click on the Next animation/picture button (or hit F12) to bring up the next thumbnail in the Wilson presentation. Selecting each subsequent item in the presentation using this method is much quicker and more seamless than by manually selecting each item one at a time from the menus.
- When finished, you can keep your presentation indefinitely, modify it later for future needs, copy it and change it for another purpose, or you can delete it.
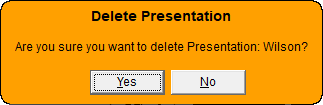
- When you want to delete a presentation, click on the red “X”.
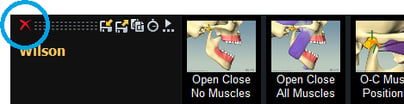
- A dialog box will appear asking if you want to delete the presentation. Click on “No” if you change your mind, or on “Yes” to complete the delete process.
Creating a Presentation Review:
- Open either the Animation panel or Picture panel.
- Drag either an animation thumbnail or picture thumbnail to a blank row.
- Double-click on New Presentation to highlight it and type in the desired name of your presentation.
- Continue adding animations and pictures as needed.
- To begin your presentation, click on the first thumbnail in your presentation to display it in the main screen.
- To cycle to the next item, click on the Next animation/picture button in the user control interface.
- When you want to delete a presentation, click on the red “X”, and then on “Yes” in the next dialog box.
If you need further assistance learning how to create your own presentations in BiteFX, please contact us by email at your convenience, or by telephone Mon-Fri 8am–5pm Pacific Time:
1-877-2BiteFX (1-877-224-8339)
International (+1) 530-582-1189