
From the desk of Stu Harman, our support and coaching expert. In this article Stu explains how to edit or replace BiteFX-provided session notes, as well as how to add session notes to the Introduction & Conclusion sections of the report and for imported images used in a BiteFX session recording.
BiteFX includes a session recording feature that documents every animation and image shown during a consultation session, which can then be edited, previewed and published. The published report can be used by the practice as an internal dental record and as a document that can be provided to the patient to remind them of what they saw and heard during their consultation. Every BiteFX animation and image includes BiteFX-provided notes that can be used as is, can be modified, or can be replaced entirely as preferred. Notes for imported images used in the session must always be added by the dentist or staff if notes for those images are desired.
This blog explains:
- Adding Notes to the Blank Introduction, Conclusion and Imported Image Boxes
- Editing/Replacing BiteFX-Provided Notes
- Copying Part of BiteFX-Provided Notes and Adding Additional Notes
- Replacing BiteFX-Provided Notes Entirely
- Restoring BiteFX Notes
Introduction
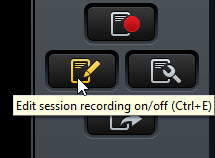
- After a session recording has been created, the next step is to add or edit the session notes where needed. If there are multiple recordings in the Session Recording Event Log, with the event log window open, select any line between Start and End in the recording to be edited. Now open the Review/Edit Session Notes window by clicking on the Edit session recording on/off button, or by pressing Ctrl+E on the keyboard.
-
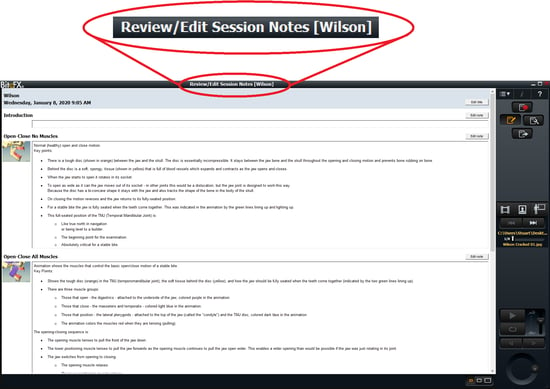
The Review/Edit Session Notes window will appear and a bracket with the Session Name will appear at the top. Verify that the correct session recording to be edited has been selected by checking that the name in the brackets displayed in the Review/Edit Session Notes window matches the session recording name ("Wilson" in the snapshot below) to confirm to the reader that they are looking at the right report.
- Open any note editing window by clicking on the Edit note button on the upper right corner of the box, or simply click inside the box.
Adding Notes to the Blank Introduction, Conclusion, and Imported Image Boxes
Every session report includes a blank Introduction and Conclusion notes section where additional pertinent information can be added to the record. For example, the Introduction section might be used to document the patients' symptoms, complaints, concerns and goals, while the Conclusion box might be used to document diagnostic findings and treatment recommendations.
- Open the blank note editing window by clicking on the Edit note button on the upper right corner of the box, or simply click inside the blank box.

- A single, blank BiteFX Session Notes window will appear.
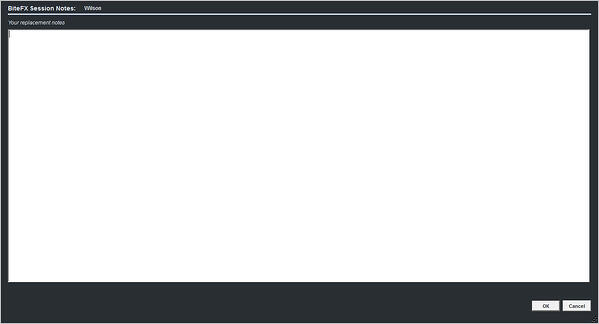
- Begin typing in notes and when finished, click on OK at the lower right corner of the window to save the notes. Clicking on Cancel will cause the window to close and revert to the Review/Edit Session Notes window, without any changes made in the replacement notes box saved. After creating initial notes, additional changes to those notes can be made any time by re-opening the Edit notes window.

- Once notes have been added for imported images (for example, photographs), those notes will be remembered and appended in a report whenever that same image is used in another session recording.
Editing/Replacing BiteFX-Provided Notes
- All animations and BiteFX-provided images used in a session recording will automatically include BiteFX-provided notes appended in the report, and are displayed when the Review/Edit Session Notes window is opened (unless they have already been modified). The image below shows the default notes provided for the animation Open-Close No Muscles.

- Important Note: When BiteFX-provided notes are replaced, the replacement notes become the standard notes whenever that animation or image is used in any subsequent session recording. See Restoring BiteFX-Provided Notes to revert to the BiteFX-provided notes if desired.
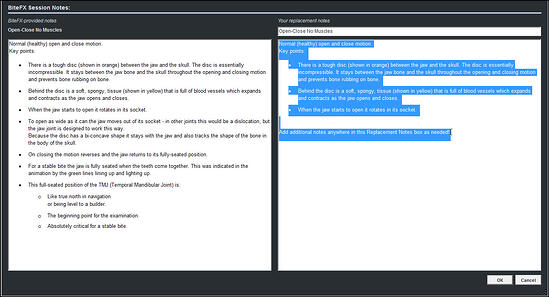
- To modify these notes, click on Edit note in the upper right corner of the box, or click inside the text box. A side-by-side window will appear:

- The default BiteFX-provided notes are displayed in the left box, and they cannot be modified or deleted, they can only be copied.
- The box on the right is where the replacement notes are created. The default name of the animation or image is displayed at the top of the right box, and can also be changed.
- There are two options when changing the default notes for an animation or BiteFX-provided image. The first option is to copy part of the BiteFX-provided notes and add in additional notes, and the second option is to replace the BiteFX-provided notes entirely with new notes.
Copying Part of BiteFX-Provided Notes and Adding Additional Notes
- Use the mouse to position the I-beam pointer at the beginning of the text to be copied in the left box, hold down the left mouse button and drag the mouse down and to the right to highlight all of the text to retained in the replacement notes.
- Left click inside the highlighted text and press Ctrl+C on the keyboard, or right click in the text and select Copy.

- Left click inside the Your replacement notes (box on the right) and press Ctrl+V on the keyboard, or right click in the box and select Paste. The selected text will be added to the edited notes box.
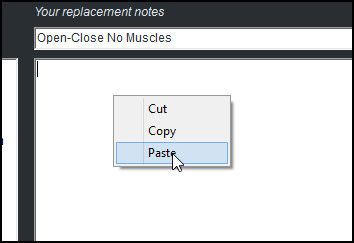

- Additional notes can be added to the pasted text anywhere at this time by typing them in using the keyboard. When finished, click on OK in the lower right corner of the BiteFX Session Notes window.

- The Review/Edit Session Notes window will open again with the new replacement notes for that animation or image displayed.

Replacing BiteFX-Provided Notes Entirely
- Left click in the Your replacement notes (the box on the right side) and type in the replacement notes using the keyboard, and then click on OK in the lower right corner of the window.


Restoring BiteFX-Provided Notes
- Open the BiteFX Session Notes editing window by clicking on the Edit note button, or click inside the text box.
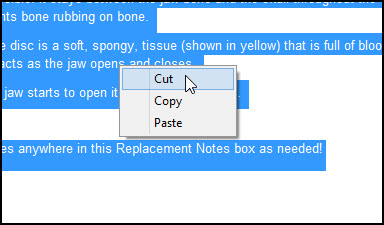
- Highlight all of the text in the Your Replacement Notes box.
- Now right click inside the highlighted text and select Cut, or just press Ctrl+X on the keyboard after highlighting the text, and then click on OK in the lower right corner of the window.
- The Edit/Review Session Notes window will re-open with the BiteFX-provided notes restored.

If you need further assistance learning how edit and add notes to BiteFX session recordings, please contact us by email at your convenience, or by telephone Mon-Fri 8am–5pm Pacific Time:
1-877-2BiteFX (1-877-224-8339)
International (+1) 530-582-1189