
From the desk of Stu Harman, our support and coaching expert. In this article Stu explains how to navigate through and use the Options submenu that was revised and released with BiteFX.
The Options menu allows you to modify a variety of BiteFX software functions, appearances and behaviors to suit your particular needs and preferences.
To help you become a master using the Options menu, here's a detailed tutorial that explains how to use each element of the menu. Another resource that can help you learn how to use the Options menu is the User Guide, which can be displayed by starting your BiteFX software and selecting Menu>User Guide.
Options Menu
Opening the Options Menu
To access the Options menu, start your BiteFX software and select Menu>Options. A screen will appear displaying the ten (10) Option submenu categories. To open any category, just click on the category name.
Options Menu Categories
The Options menu consists of the following categories (click on each of the Option category names to go directly to that section of the tutorial):
- View - Windows
- View - Text and Icons
- Function Behaviors
- Updates
- Session Reports
- Date/Time Format
- Information Sharing
- Usage Tracking
- Warnings
- Advanced
View - Windows
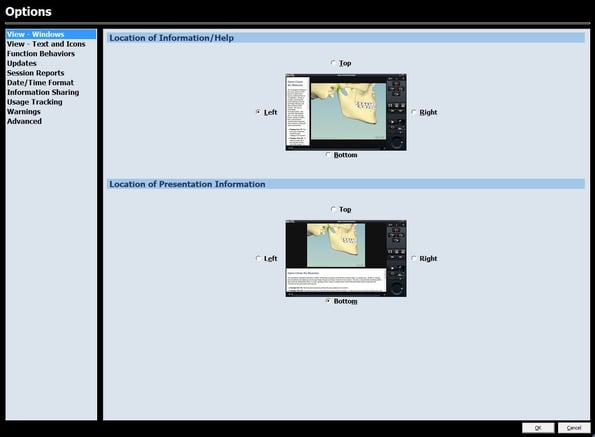
The View - Windows submenu allows you to select the position of the Information and Help panes, and the position of the Presentation Information pane to the left, right, top or bottom of your BiteFX main screen. To change the position, simply click inside the circle to the left of the location where you wish the panes to appear.
The default setting is for the Information and Help panes to appear on the left side, and for the Presentation Information pane to appear at the bottom.
View - Text and Icons
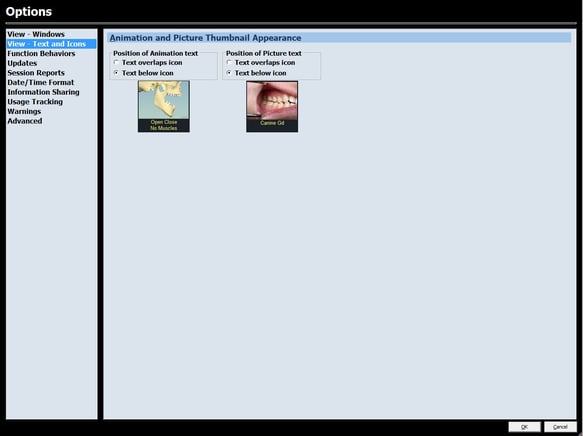
The View - Text and Icons submenu allows you to select how the text appears on the Animation thumbnails and on the Picture thumbnails. The text position can be changed independently for Animation and Picture thumbnails.
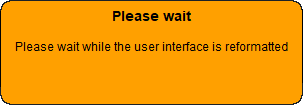
The default setting for both is for the text to appear below the thumbnail icon. To change the text to the overlap position, simply click inside the circle to the left of "Text overlaps icon". The following "Please wait" message will appear briefly as the user interface is reformatted.
Below are examples of the two text position options:

Text below icon Text overlaps icon
Function Behaviors
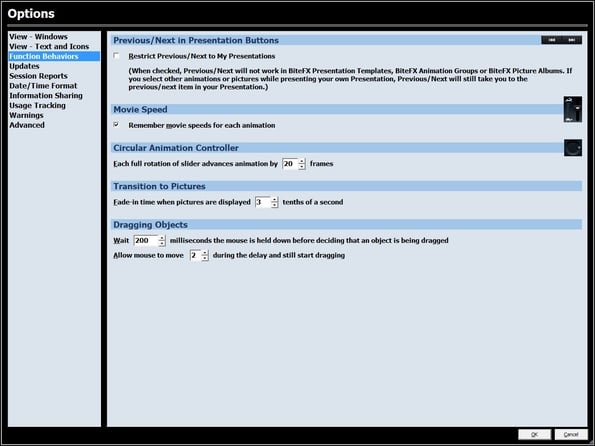
This submenu allows you to modify the behavior of the software with respect to:
- Previous/Next in Presentation Buttons
- Movie Speed
- Circular Animation Controller
- Transition to Pictures
- Dragging Objects
Previous/Next in Presentation
When using a presentation you've created in "My presentations" for a patient consult, it may be desirable to select a picture or animation not included in the presentation, and then return back to your presentation where you left off. When this option is checked, the "Next animation/picture" and "Previous animation/picture" buttons will only work in your user-defined presentation group. If you select other animations or pictures not included in your presentation, the "Next animation/picture" and "Previous animation/picture" buttons will revert to, and select the next or previous item in your presentation. This feature is useful because you don't have to remember where you left off in your presentation, nor do you have to open the Animation or Picture panel to select the appropriate animation or picture in your presentation to resume where you left off.
The default setting is for the Previous/Next in Presentation buttons to work for BiteFX animation groups, Picture albums, Presentation Templates, and user-defined presentations.
Movie Speed
BiteFX includes a Control Play Speed slider to set how fast or slow the software plays an animation. If you don't want the software to remember where you last set the play speed for each animations, uncheck the box and each to time you re-select any animation, the play speed will be whatever speed was set for the last animation you played before unchecking the box.
The default is for the software to remember the play speed that you set for each individual animation.
Circular Animation Controller
In case you weren't aware, the BiteFX animations consist of a series of discrete frames that, when played progressively, give the appearance of a continuous movie. The circular slider lets you play any part of the animation frame-by-frame, and at any speed you like using a clockwise-counterclockwise movement of the mouse. Each 360 degree rotation of the circular slider movies the animation a specific number of frames. To change the value, click on the up or down arrow.
The default is for the circular slider to play the animation forwards or backwards 20 frames per full rotation of the slider.
Transition to Pictures
To enhance the aesthetic appearance when a picture is selected, the software has a fade-in delay effect that can be set between 0-50 tenths of a second, which produces from 0-5 seconds of fade-in time.
The default is for a picture to take 0.3 second to fully fade in.
Dragging Objects
Because some mouse pointing devices are more sensitive than others, it is possible that when attempting to select an animation or picture by clicking in its thumbnail, the action causes the object to be dragged instead of selected. To compensate for this, you can change the "Wait" setting to establish how much time you must hold down the mouse button (up to 1 second) before the software will enable dragging. The second setting allows you to set how sensitive the software responds to minor movement of the mouse while holding it down before resetting the hold-down clock.
The "Wait" default setting is for you to hold down the mouse button for 200 milliseconds or more for the software to let you drag the object.
The default setting for the "Allow mouse" movement sensitivity is 2 pixels.
Updates
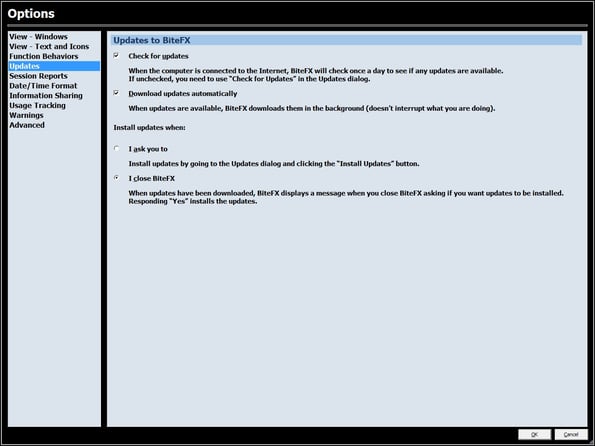
The Updates submenu lets you determine how you want updates to be detected, how they are downloaded and when updates are installed.
Check for updates
Once BiteFX is started, after a slight delay it will automatically connect to the BiteFX server to check for available updates. If this option is unchecked, you must click on Menu > Updates to open the BiteFX Updates dialog box and then click on the "Check for updates" box to initiate the process manually.
The default is for the software to automatically check for updates after it is started.
Download updates automatically
Once updates have been detected, the next step is to download those updates. If this option is unchecked, you must click on Menu > Updates to open the BiteFX Updates dialog box and click on the "Download updates" box to initiate the process manually.
The default is for the software to automatically begin downloading all available updates as a background process soon after BiteFX has been started.
Install updates when:
Regardless of which option is selected for this function, the process of installing updates must be initiated by you. If the option, "I ask you" is checked, you will need to open the BiteFX Updates dialog box and click on "Install updates". If the option "I close BiteFX" is checked, a message will appear asking you if you would like to install the updates. Clicking on "Yes" will cause BiteFX to close and for the update process to be completed.
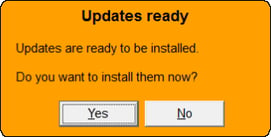
The default is for the option, "I close BiteFX" to be checked.
Session Reports
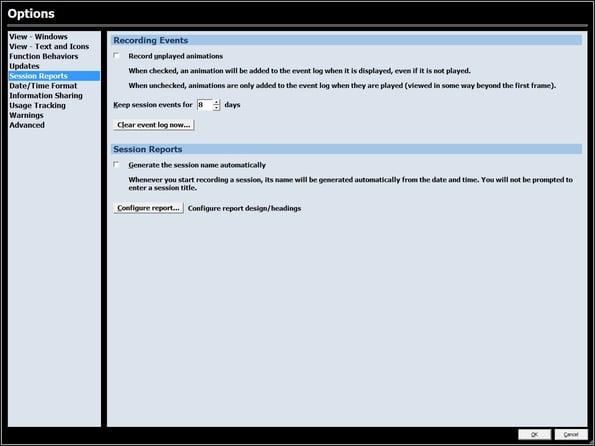
The Session Reports submenu allows you to determine how certain function related to the creation of session reports behave and appear.
Recording Events
This category includes three sub-options:
Record unplayed animations
If you plan on bringing a patient back at a later date for their consultation, and wish to produce a report for that session, you can pre-record the consultation by starting the recording and selecting each animation and picture you intend to show the patient during the live consultation. This gives you the advantage of having a finished report available to give to the patient to walk out the door with in their hands. If this option is checked, you merely have to select an animation while the record function is active and it will be captured as a recorded event. If unchecked, you need to advance the animation at least one frame for it to appear in the recording.
The default setting is to require the animation to be advanced at least one frame to be captured in the recording.
Keep session events for "X" days
The Session event log is a chronological list of every animation and picture that has been selected over a period of time. The log's principle function is to allow you to create a recording after the fact in case you forget to start to record a live session (See What to Do When You Forget to Record a BiteFX Session). Any event in the log that is older than the number of days selected will be automatically dropped from the log. The number of days can be set between 0-30 days.
The default setting is eight (8) days.
Clear event log now...
If you would like to remove all of the events in the session log at once, click on this button and then on "Yes" to confirm you want clear the log.
Session Reports
This category has two sub-options:
Generate the session name automatically
If this option is checked, a session recording name will be automatically generated by the software and include the following:
- The text "Session started" followed by,
- The date
- The time
The default is for you to input the session name as you prefer.
Configure report
Clicking on the button will display a dialog box where you can modify the appearance of the published PDF report including logo selection, whether to include the date and/or time on the report, and headers text and background color.
Date/Time Format
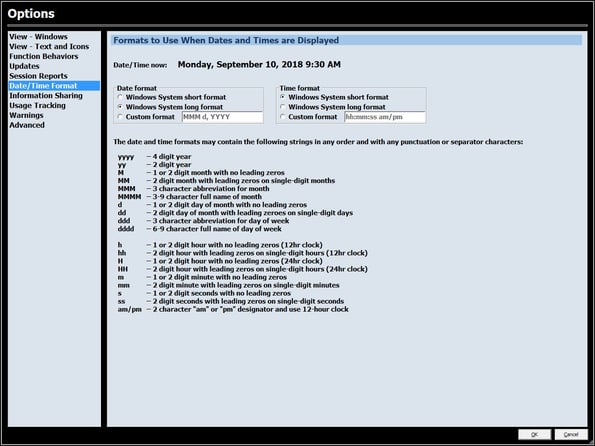
You can modify how the date and time is formatted and will appear in BiteFX and in the session report. Dates can be displayed numerically, or alphanumerically with abbreviated or full month and day names. Times can be set to a 12 or 24 hour format, and whether leading zeros are included in the date or not.
Information Sharing
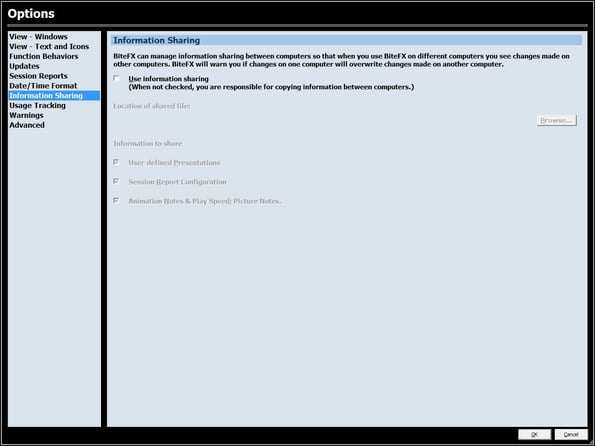
Each copy of BiteFX is a separate and distinct software installation, and in most respects they operate independently from one another. However, with information sharing enabled, some key functions of BiteFX can be shared between computers.
Information Sharing
When this option is checked, you can select which attributes from the local computer can be shared with other BiteFX computers. The first step is to create a BiteFX Shared Information folder on a network shared drive that is mapped to each of your BiteFX computers. After enabling "Use information sharing" by checking the box, the next step is to click on the "Browse" button and select the folder you've created. The final step is to uncheck the box for any category you do not want to share with other BiteFX computers.
- User-defined Presentations
- Session Report Configuration
- Animation Notes & Play Speed; Picture Notes
Usage Tracking
![]()
When enabled, BiteFX is sent anonymous metadata to help us prioritize future developments and focus on which elements of the software are used most. The information is kept strictly confidential and is never shared with outside parties. When BiteFX is first installed, you will be asked if you agree to share your usage data with BiteFX.
The default is for the data not to be shared with BiteFX. To enable it, you must click on "Yes" when prompted.
Warnings
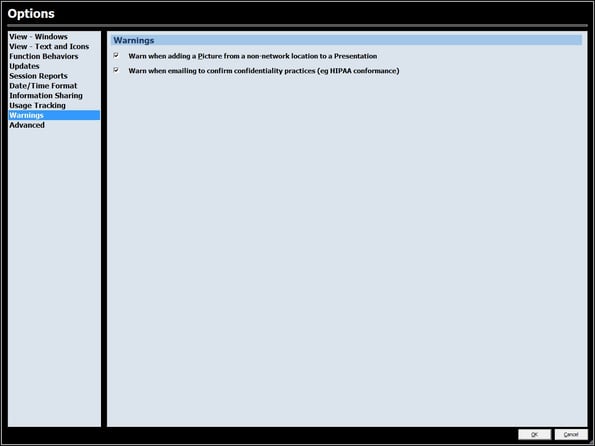
There are two situations that will cause BiteFX to display a warning message under the right conditions. Here are the categories and reason for having the warning message:
When adding a picture to a presentation from a non-network location
If you have activated Information Sharing that includes the "User-defined Presentations" category, and you add a picture to a presentation that has been imported from the local computer or other non-network location (e.g. a flash drive), in the default setting you will see the following message:

The warning is provided to advise that if you share or save that presentation to another computer, when you select the picture the image, it may not be available and the image will appear as a black screen.
When emailing
When publishing a BiteFX Session Report, if you use the "Send email" option, there is a potential that the email service used is not compliant with applicable regulatory statutes related to patient record confidentiality (e.g. HIPAA). To alert you to be mindful about that possibility, in the default setting the following warning message appears when you click on "Send email":

Advanced
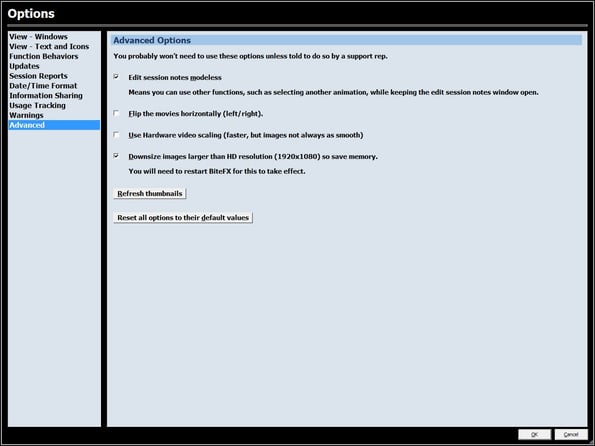
This sub-menu allows you to make any changes to some advanced settings in the software, though these are changes you will be more likely to want to change unless directed to by a BiteFX support representative. Categories included are:
- Edit session notes modeless
- Flip the movies horizonally
- Use hardware video scaling
- Downsize images larger than HD resolution
- Refresh thumbnails
- Reset all options to their default values
If you need further assistance learning how to use the Options menu in BiteFX for Windows, please refer to the Options section of the BiteFX User Guide for a more comprehensive description (start BiteFX, select Menu>User Guide), or if you need additional assistance you can contact us by email at your convenience, or by telephone Mon-Fri 8am–5pm Pacific Time:
1-877-2BiteFX (1-877-224-8339)
International (+1) 530-582-1189